
How to set up Chatfuel + ChatGPT automation for eCommerce sales on WhatsApp
Leverage WhatsApp for your business with a step-by-step guide
In this article, we’ll show you how to increase eCommerce sales for your store by using sales automation with Chatfuel and ChatGPT.
We’ll show you how to leverage WhatsApp for your business with a step-by-step guide on how to set it all up. The goal is to get you prepared for an influx of customers, making sure that you maximize your sales while reducing the workload on your team at the same time.
Let’s get started.
The setup guide
- Connect your WhatsApp number to Chatfuel
To do this, you will first need to log in to your Chatfuel account.
We strongly recommend using a new number for the WhatsApp + Chatfuel integration. This is because a phone number connected to Chatfuel can’t be already in use in other WhatsApp Business accounts, the WhatsApp application, or with the WhatsApp Business application.
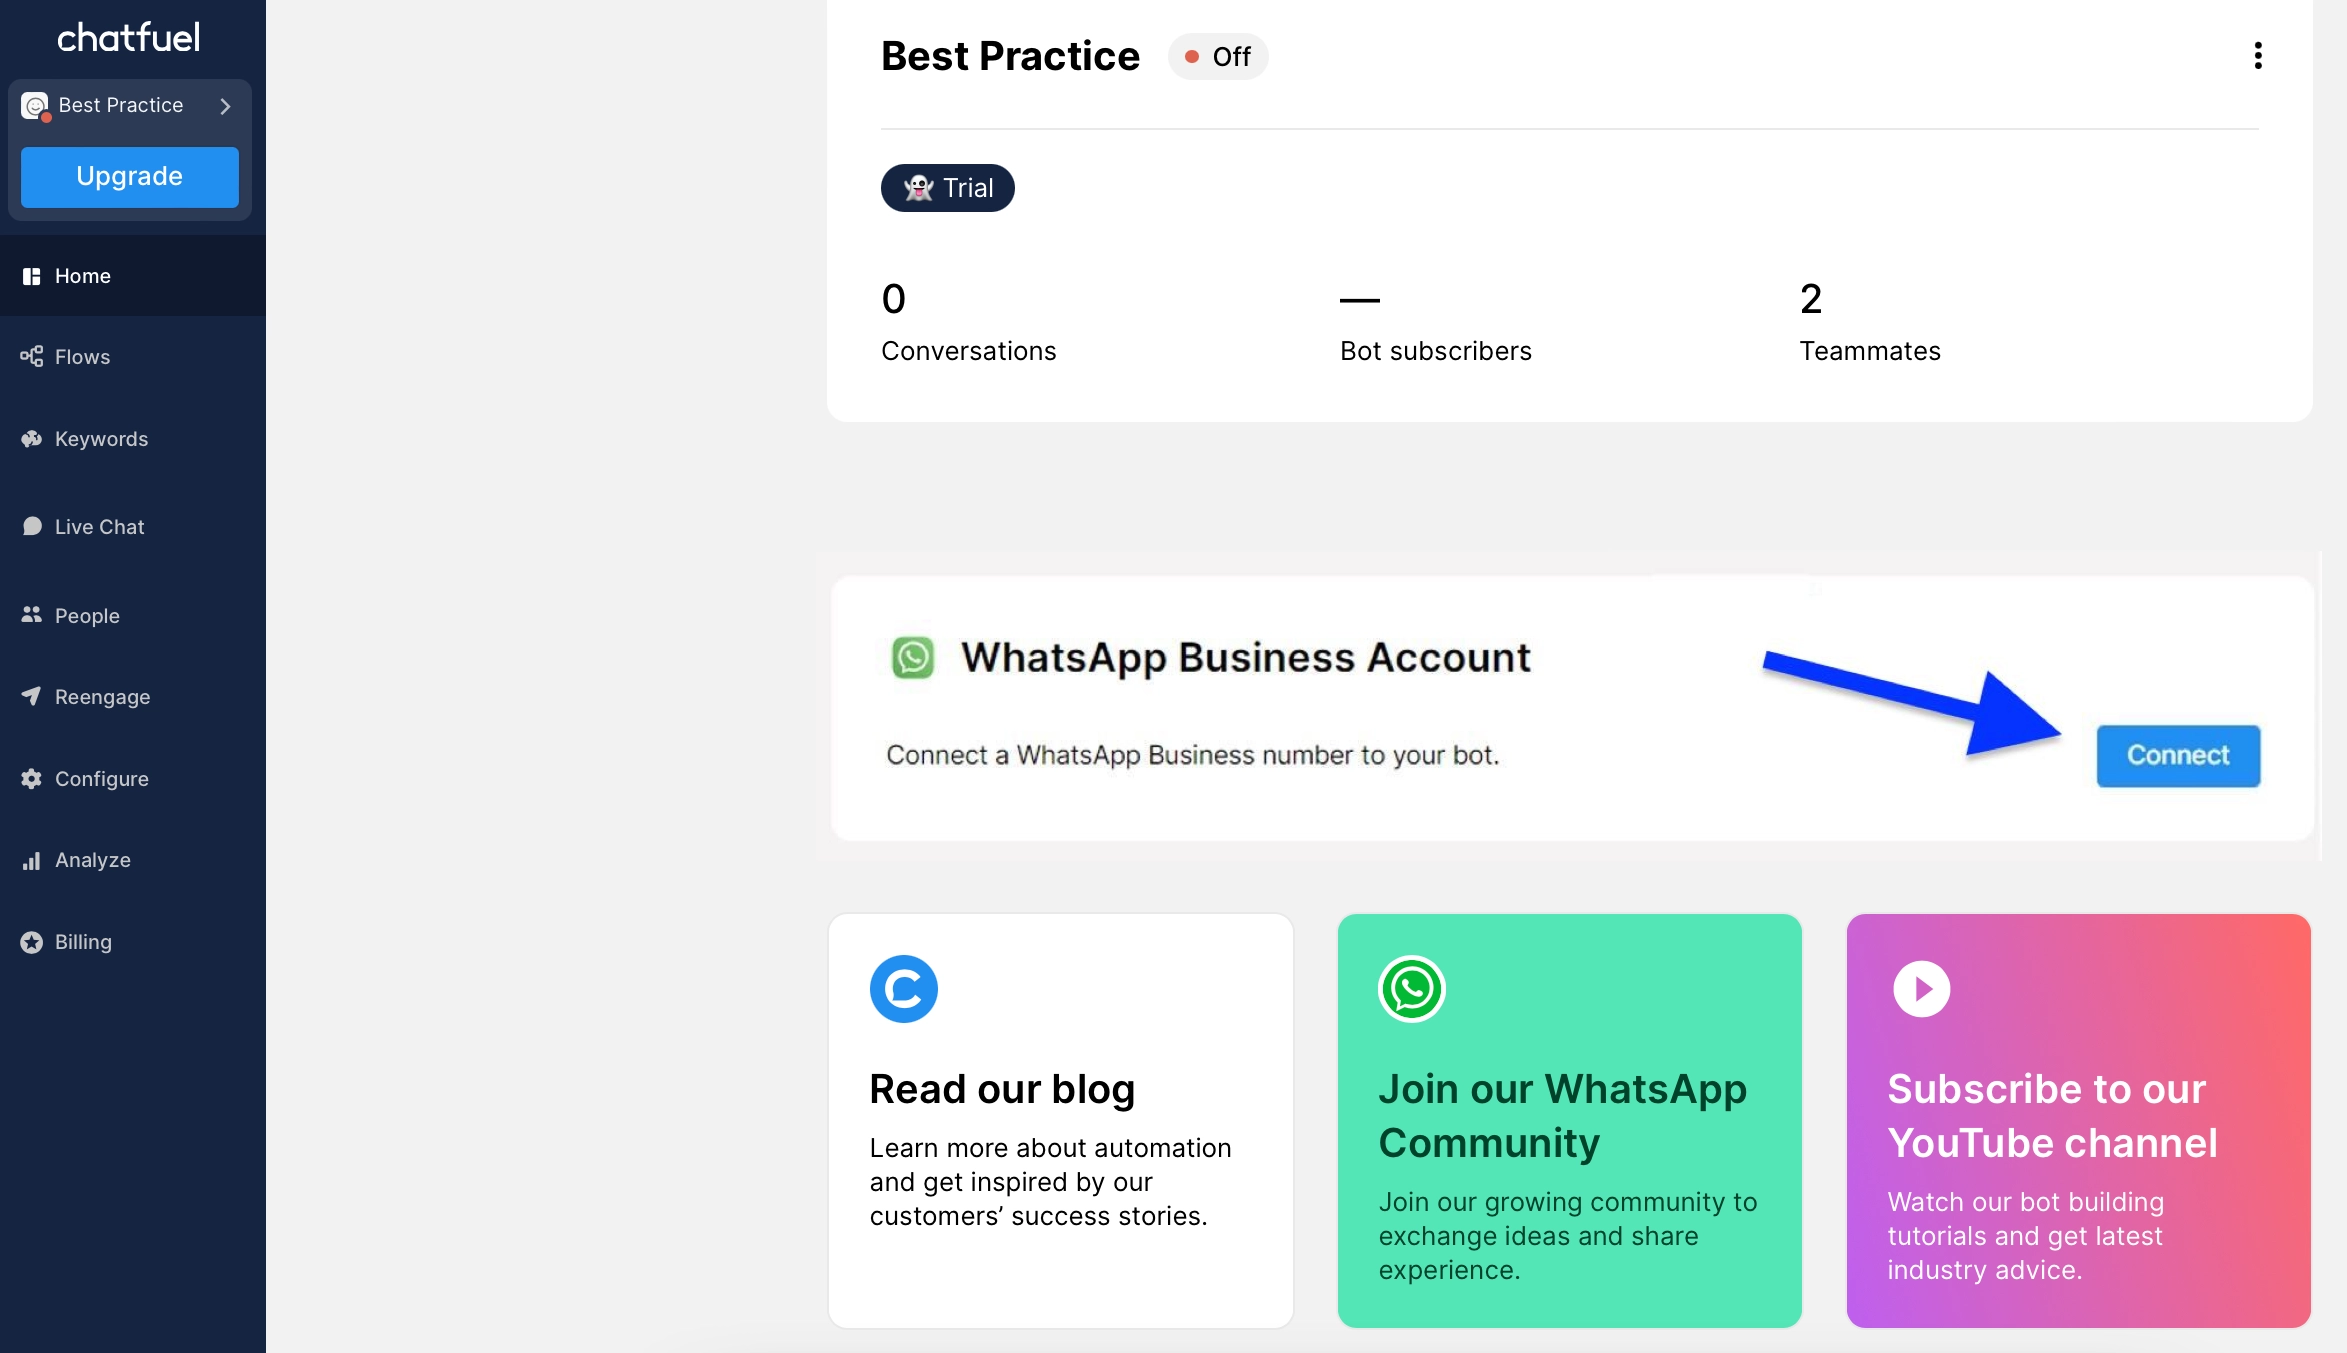
Once you’re in your dashboard, go to the ‘Home’ section from the left-side menu.
Scroll down to the WhatsApp Business section and click on ‘Connect.’
Choose the option ‘Use your number’ and click ‘Next.’
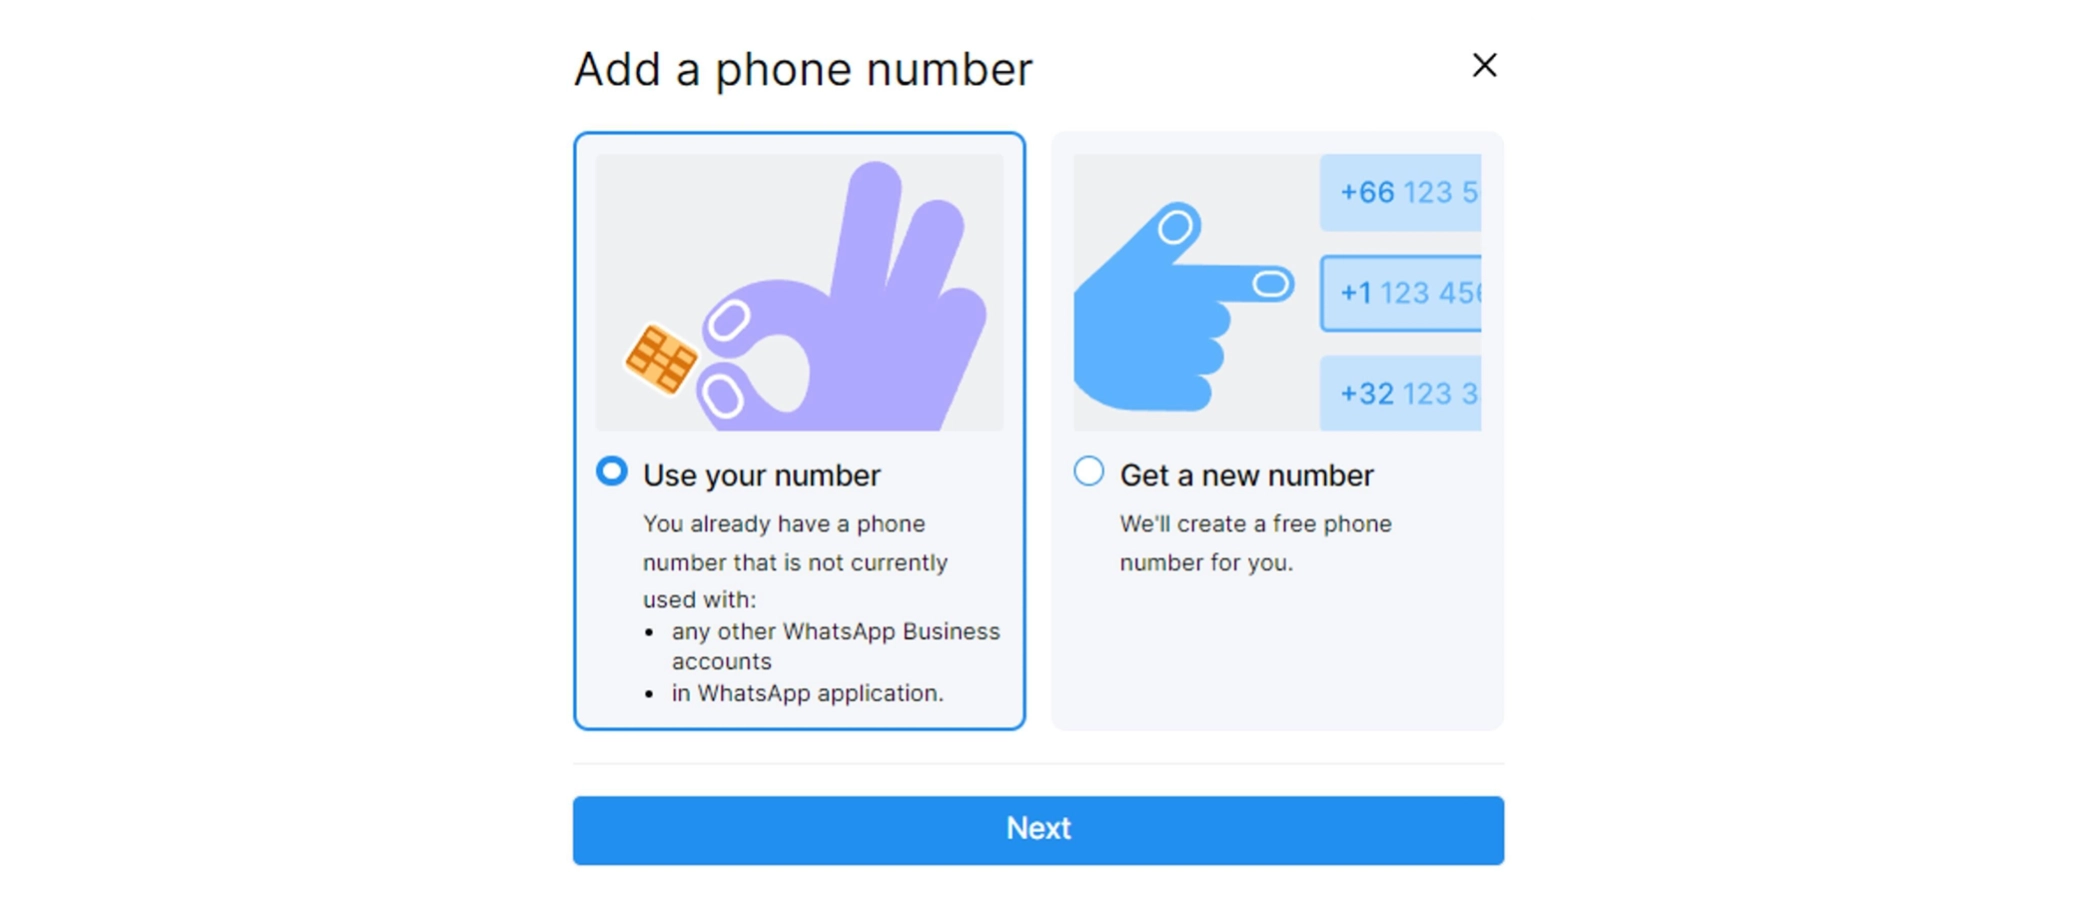
Follow the steps in the pop-up window to log in to your Meta Business Account and verify your phone number.
- Copy the template
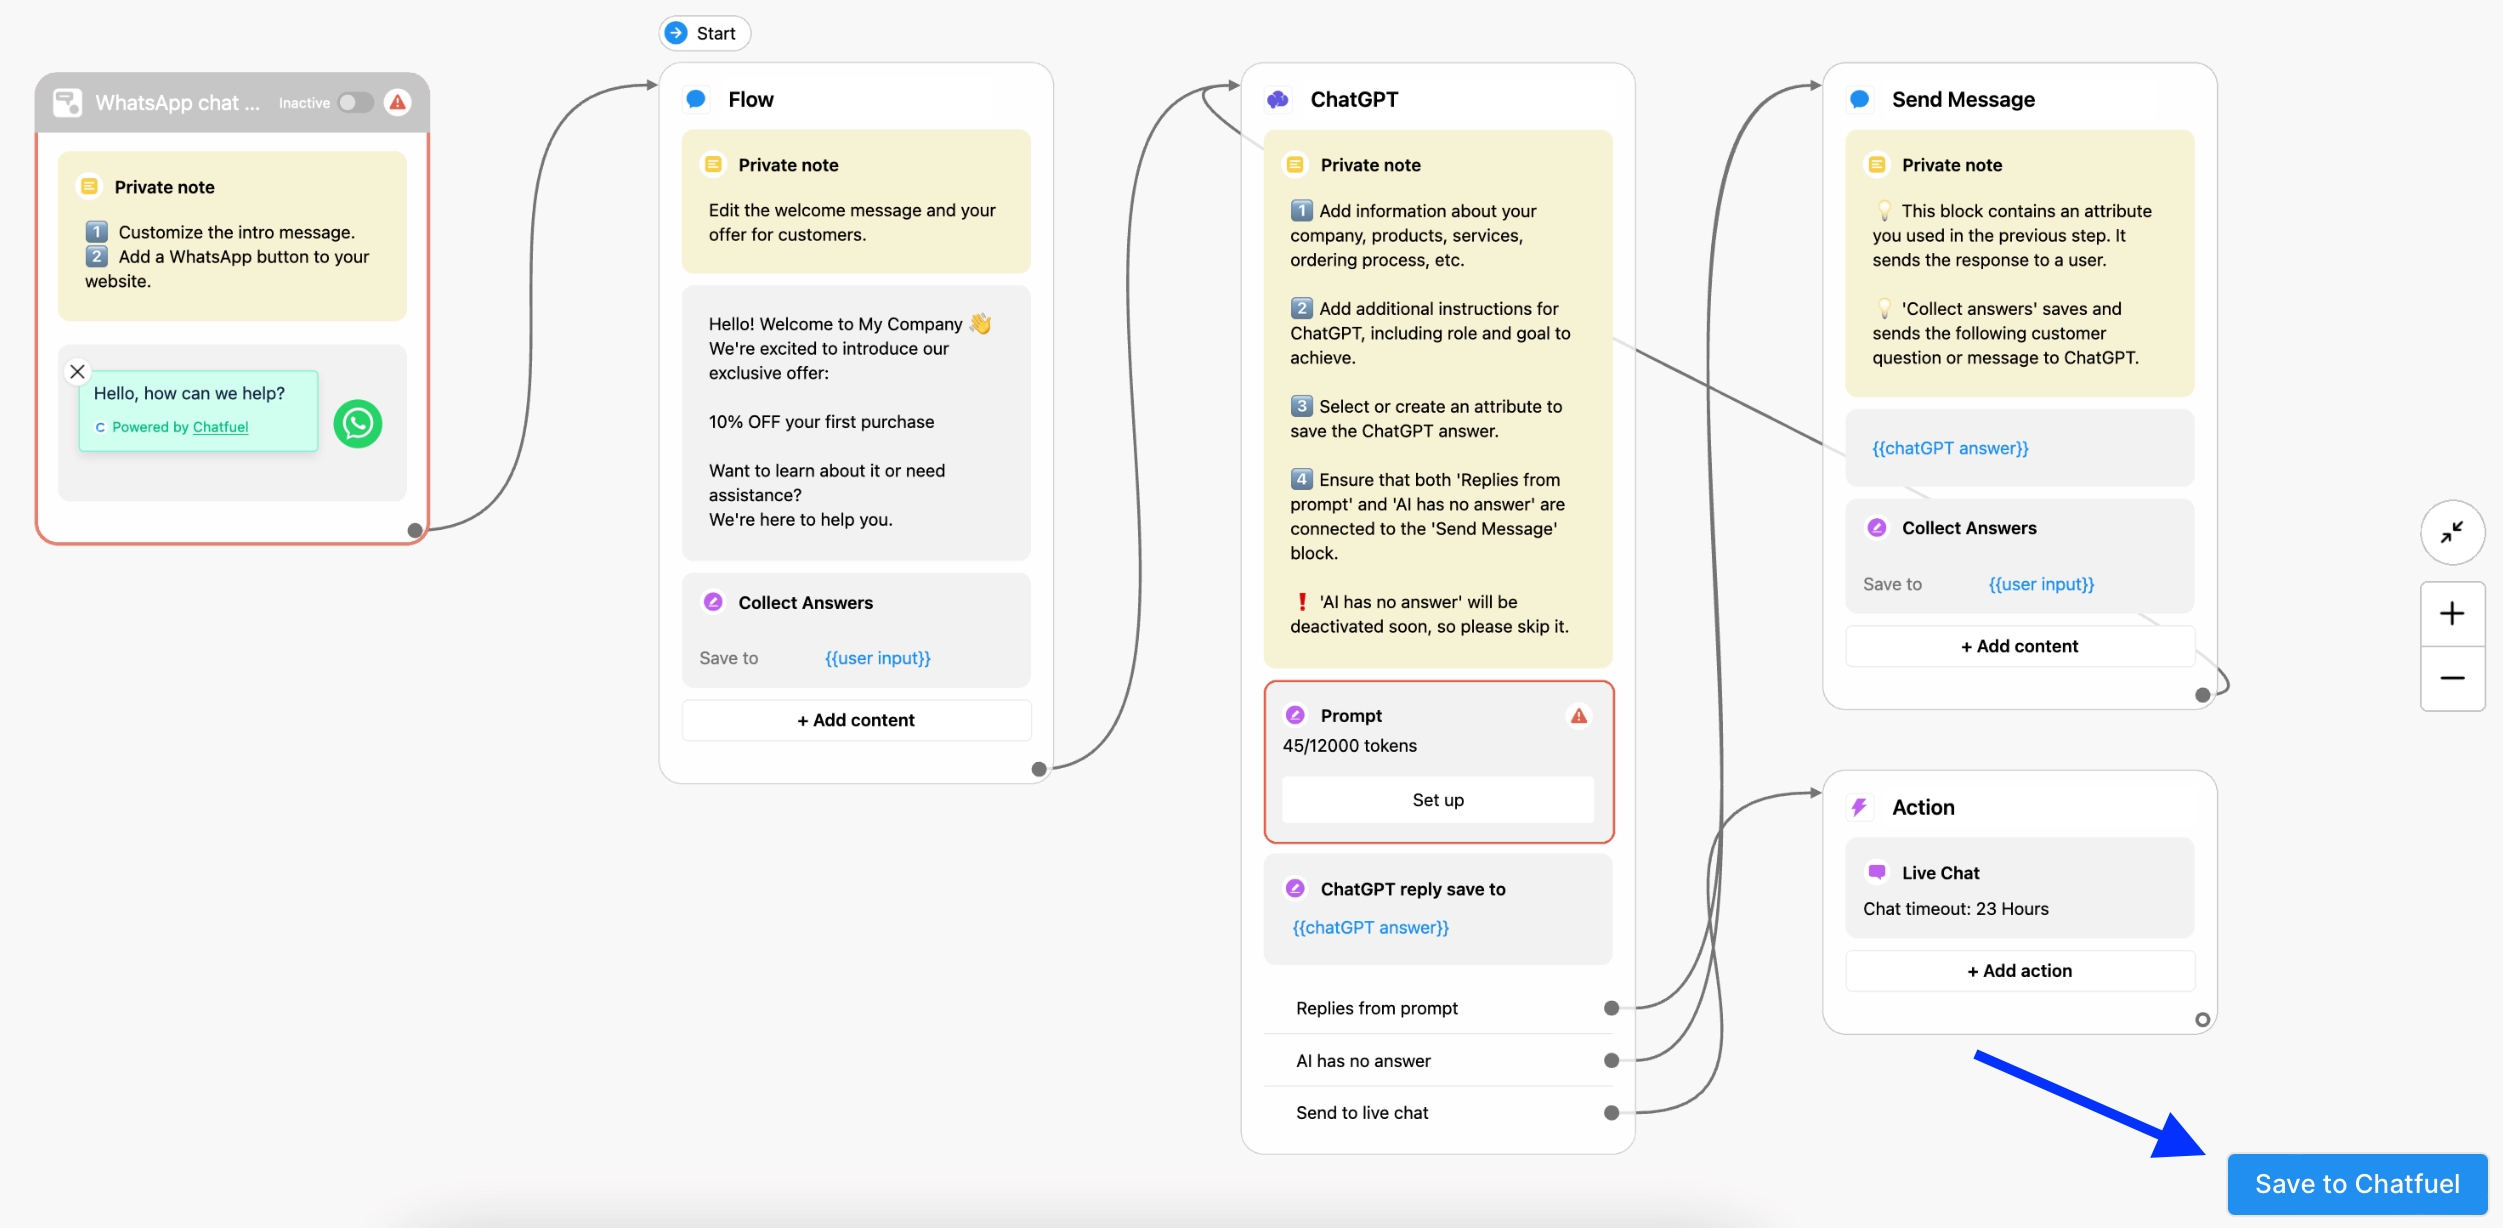
Do it by following this link and then clicking ‘Save to Chatfuel’ in the bottom right corner.
- Add your business details to the flow
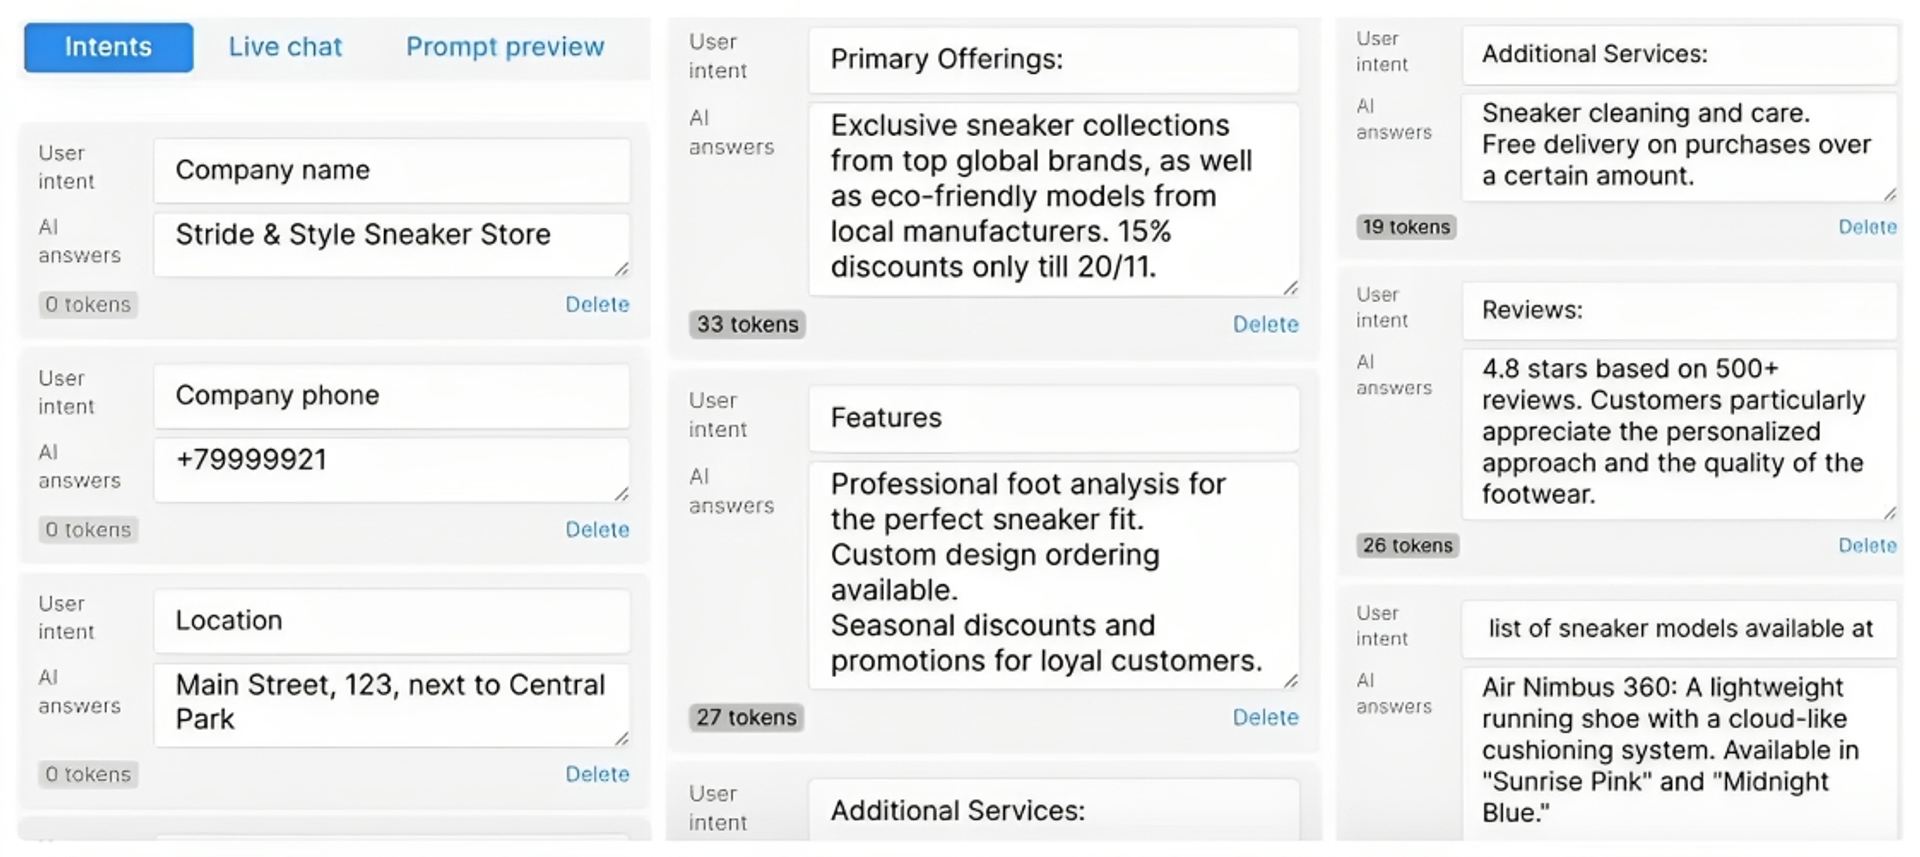
Once you copied your template, open it and click on the ‘Set up’ button in the ChatGPT block.
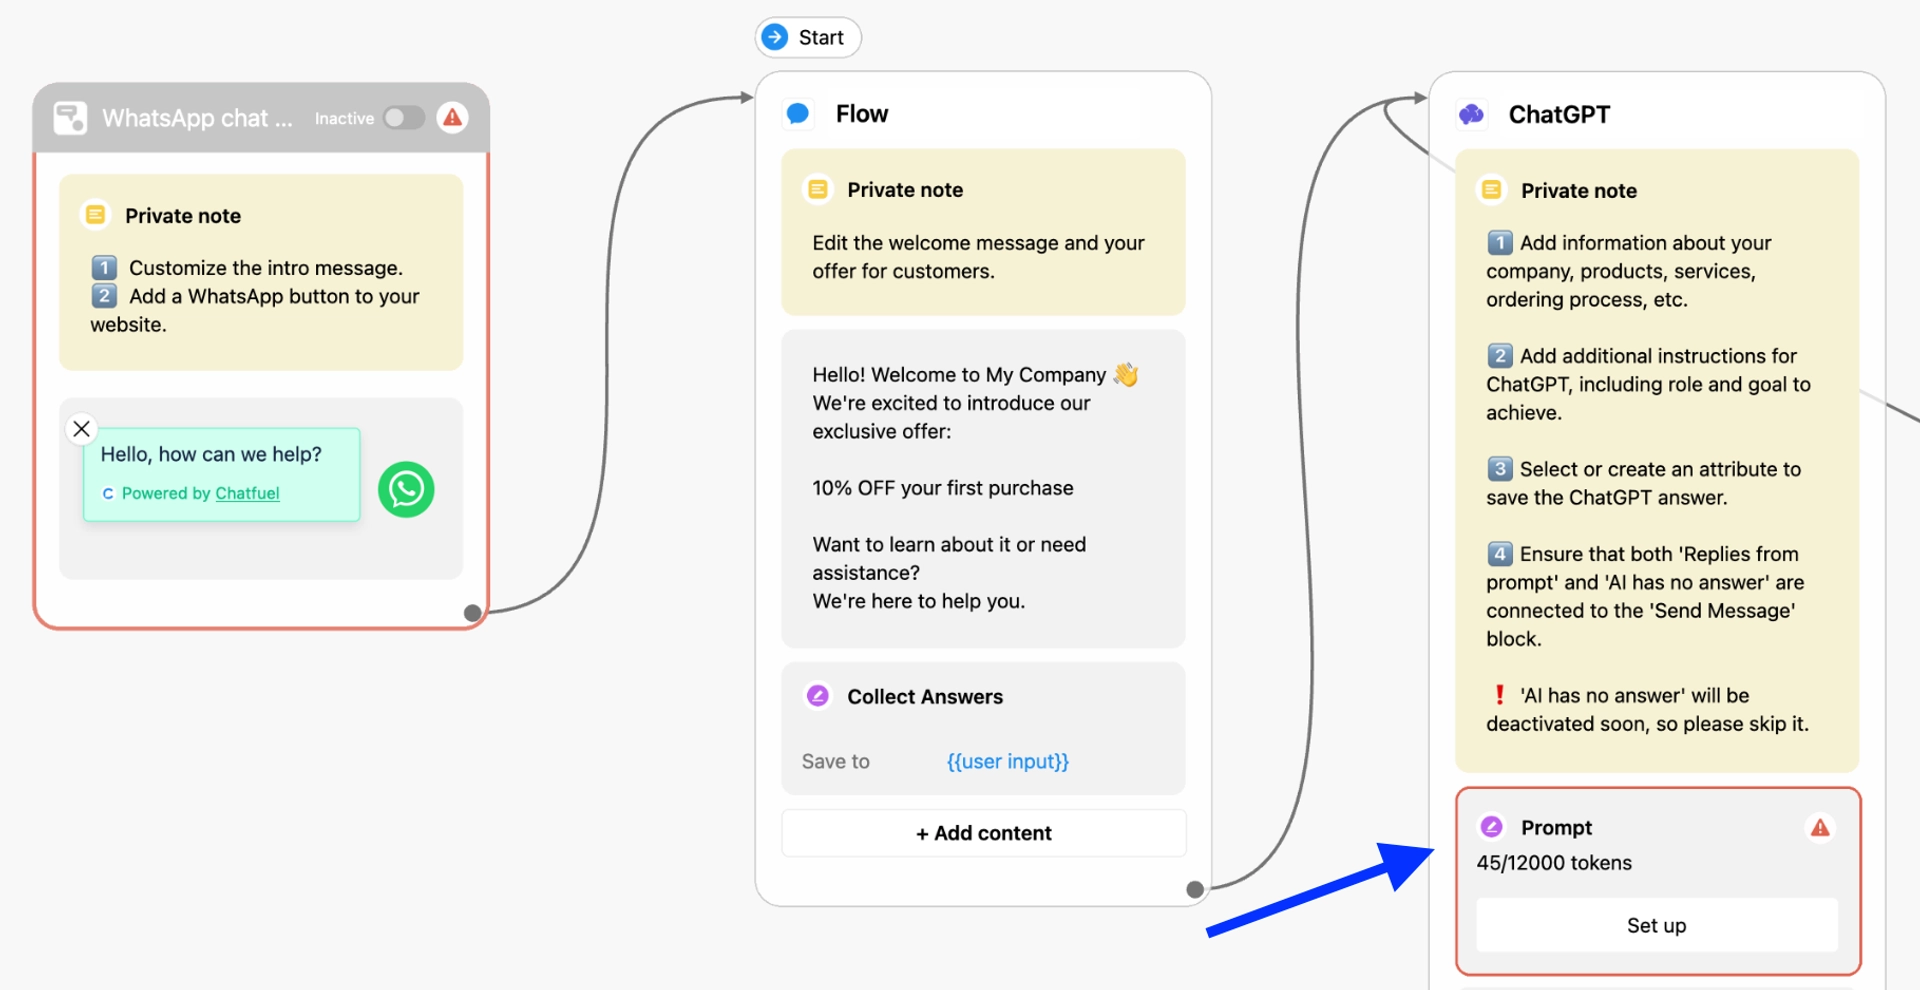
Here, you can add information about your company, such as the name, phone number, address, offerings, and more. We recommend adding all relevant information in this section so that ChatGPT knows how to help your customers.
Once you’re done, click on ‘Test this flow’ in the bottom right corner to see how your flow is working.
- Add the WhatsApp button to your website
This is what we call an ‘Entry Point’ at Chatfuel. It’s the way that users enter your flow. Or, in your case, how users enter the ChatGPT-powered template you duplicated above. Follow the steps below for this final stage of the setup.
Click on the WhatsApp entry point in your template.
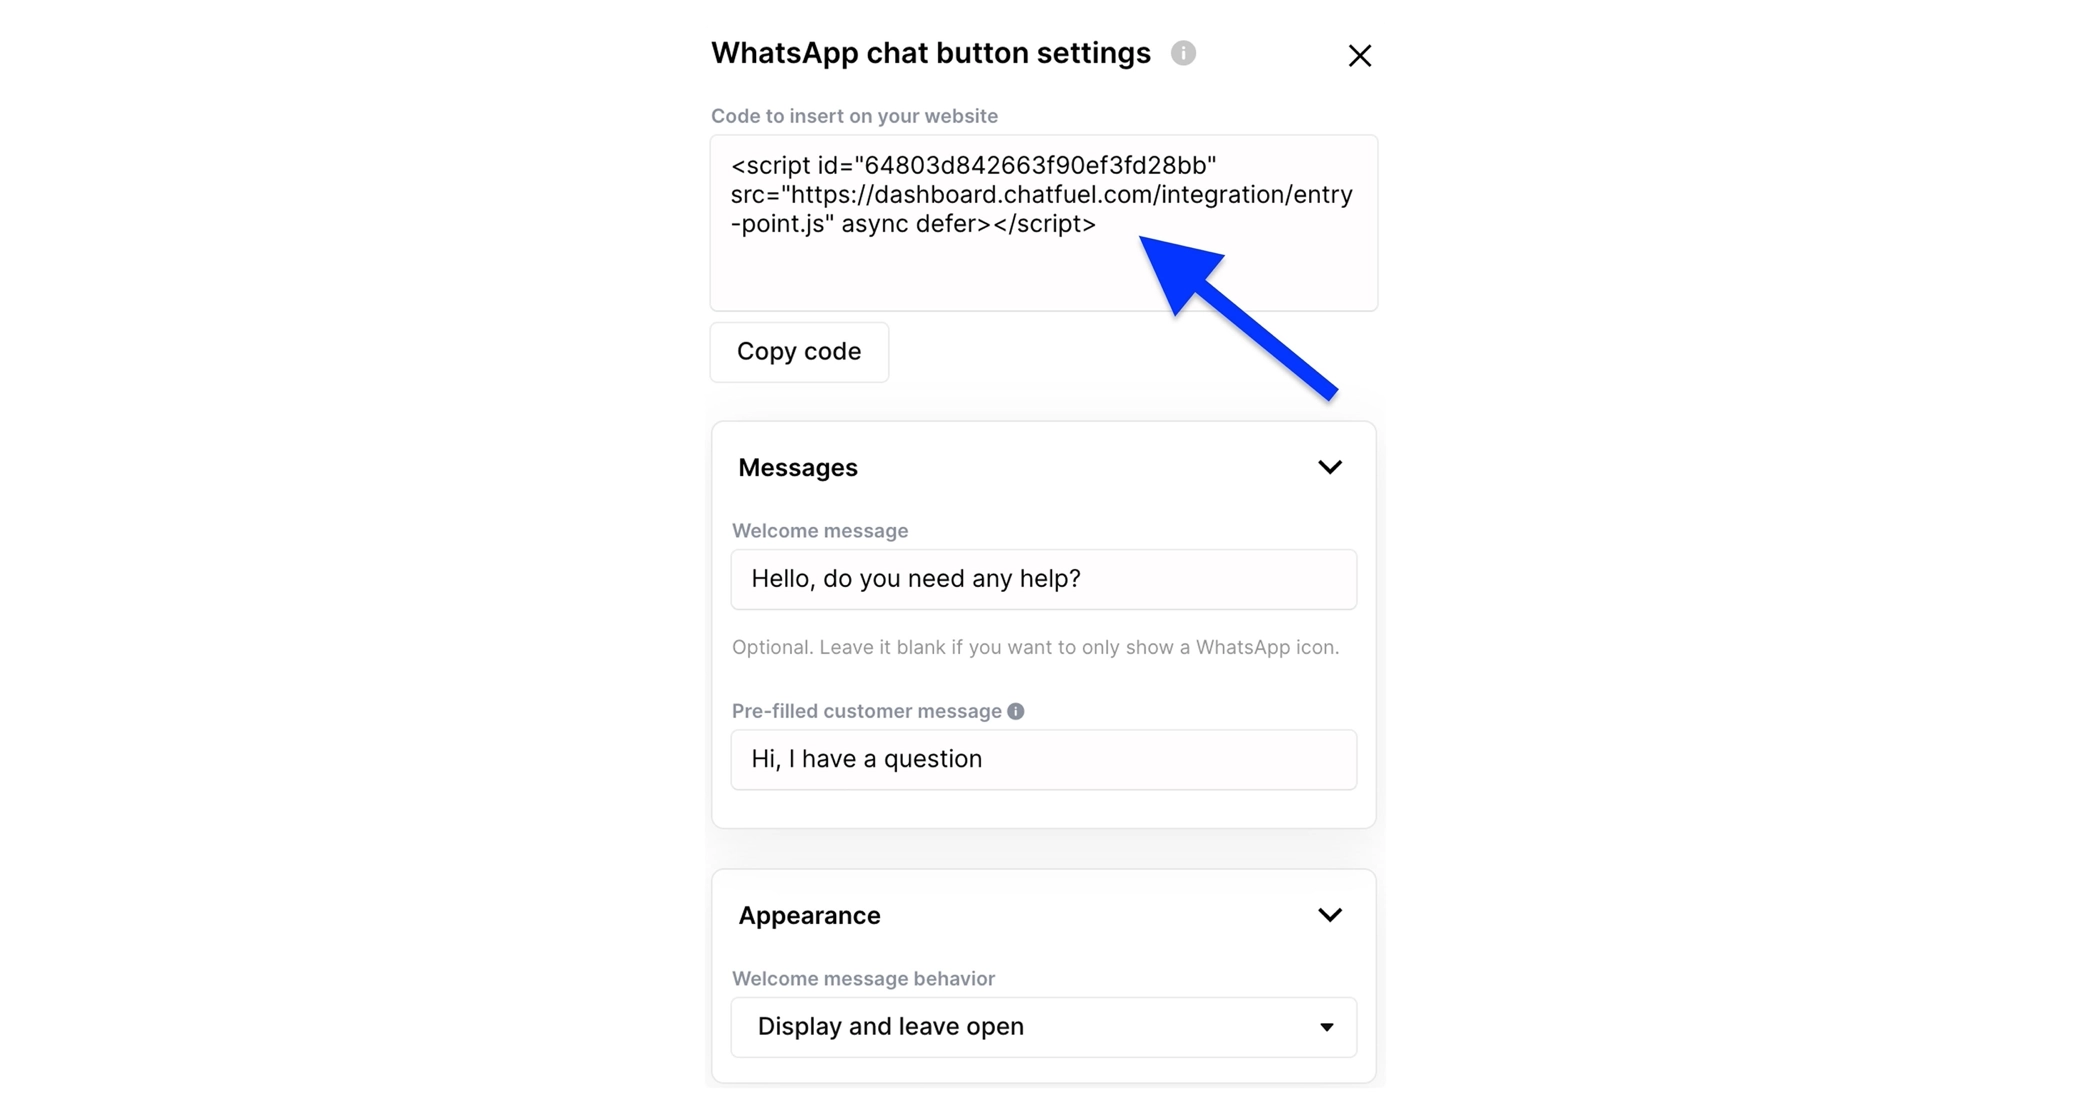
Open the settings by clicking on the content in the block.
In the top left corner, copy the code, which you can paste into your website’s HTML.
If you have a WordPress website:
Login to your admin panel and select ‘Appearance’ → ‘Theme File Editor.’
In the upper right corner, select your current theme in the drop-down menu (usually assigned by default).
Under ‘Theme Files,’ select ‘Theme Footer/footer.php.’
In the text area, add the Chatfuel embed code right above the closing tag.
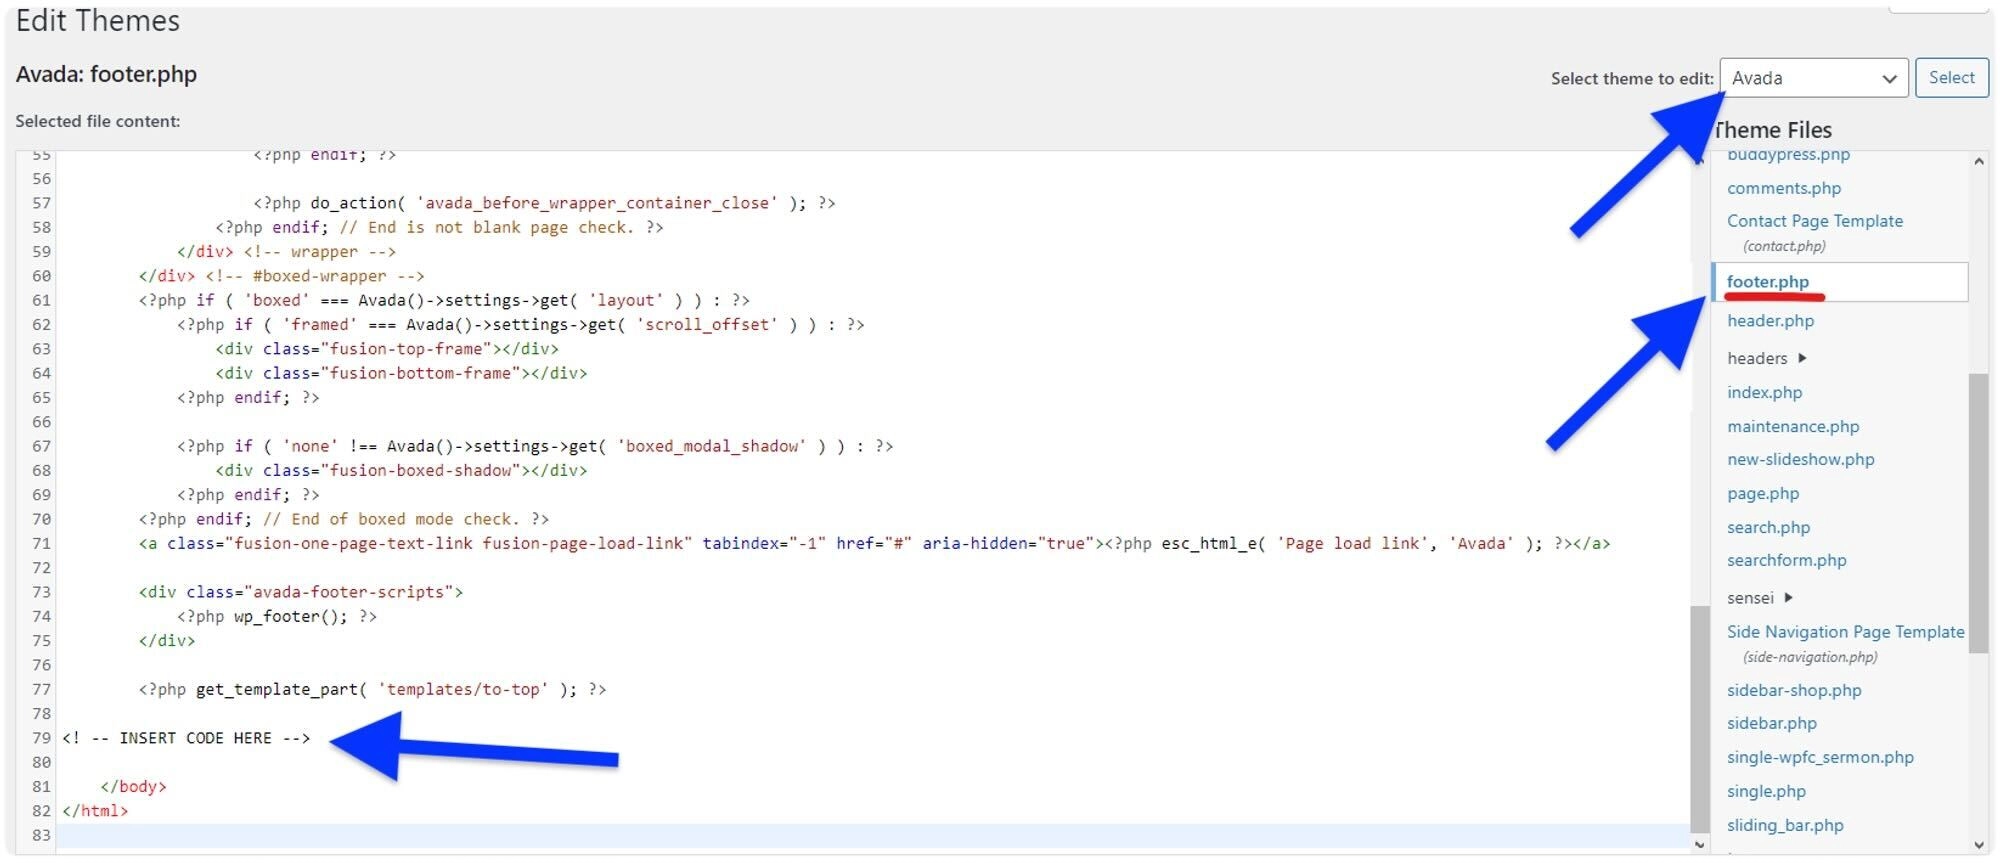
Click ‘Update File’ to save your changes.
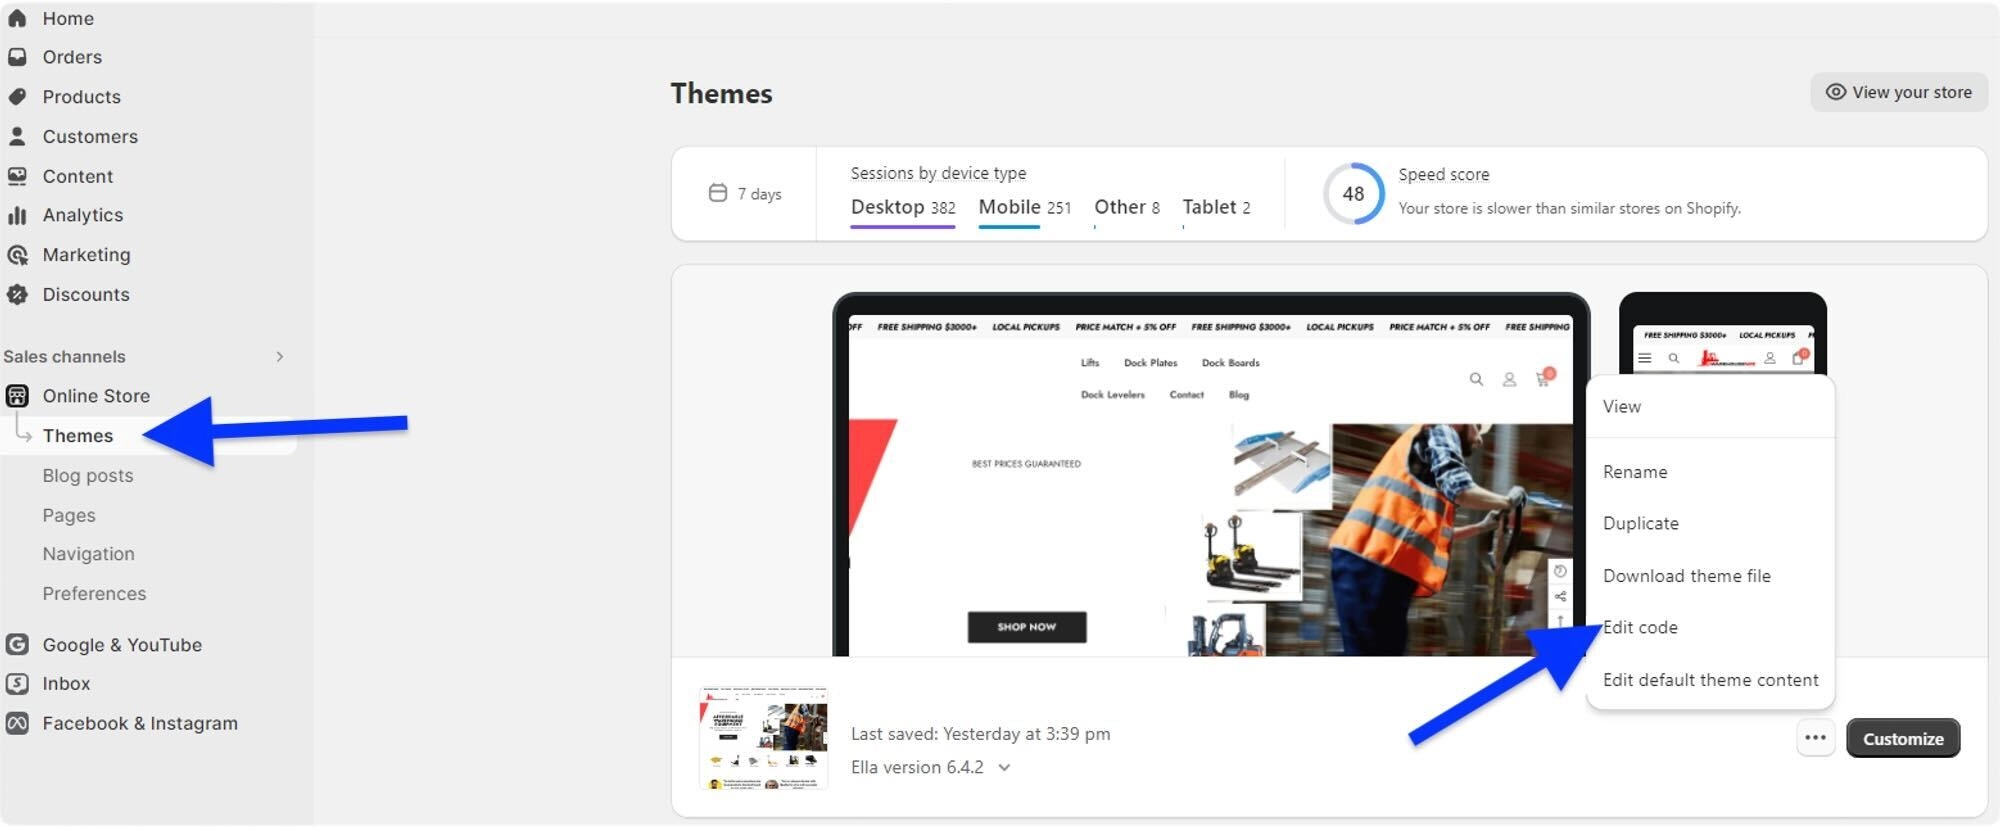
If you have a Shopify website:
Click on ‘Online Store.’
Go to ‘Themes’ → ‘Actions.’
In the drop-down menu, click ‘Edit Code’ to open your Shopify store theme editor.
Locate the ‘theme.liquid’ file in the menu and paste the code after the body tag. Save the changes, and you’re done.
If you are not comfortable with the code part, we recommend that you ask your webmaster for support.
Note. If you are having trouble with any of the above steps, such as connecting your WhatsApp phone number to Chatfuel, check our WhatsApp guides for more detailed instructions and information.
Your setup should now be done, congratulations. In under 30 minutes, you equipped your website with an automated sales tool that will help you boost your sales this season.
Watch the full video below on creating a WhatsApp chat button with an AI Agent for your website, and follow the Chatfuel YouTube channel for more insights and tutorials.